
Regarding e-commerce, the significance of compelling product images cannot be overstated. A product’s visual appeal greatly influences customer decisions, and vibrant, appropriate colors play a crucial role in creating that appeal.
Whether you’re an eCommerce store owner, a photographer catering to commercial clients, or a graphic designer working on creative projects, there might come a time when you’ll need to modify the colors of product photos. This tutorial will walk you through the easiest and most effective method to change a product photo’s color in Photoshop.
By the end of this guide, you’ll master the skill of transforming the color of objects in your product photos, ensuring they look fresh, captivating, and ready to boost your visual presentation (and sales).
Why Change Product Photo Colors?
Enhance Visual Appeal
Colors can play a psychological role in catching the attention of customers and creating an emotional connection. Often, adjusting the colors of your product images can breathe new life into photos, making them look more vibrant and dynamic.
Increase Versatility
Need a product displayed in multiple colors, but only have one image? Changing the color in Photoshop enables you to show your product in a range of color options without reshooting it.
Correct Visual Mismatches
Imperfect lighting or camera settings can sometimes make product images look dull or untrue to the original item color. Photoshop allows you to correct these mismatches.
Boost Sales
High-quality images drive customer engagement. When your product looks its best, shoppers are more likely to click that “Add to Cart” button.
Whether you’re aiming for enhanced visuals, versatility, or product accuracy, Photoshop is your ultimate tool!
Now, let’s get started.
How to Change Product Photo Colors in Photoshop
This step-by-step guide will teach you how to edit product photo colors easily. For this tutorial, we’ll work on a sample wall frame. However, you can use the same method for any type of product.
Step 1: Open Your Product Photo
The first step is straightforward. Launch Photoshop and open the product image you want to edit.
Whether it’s a single object or a product with multiple elements (like shoes with laces or a striped t-shirt), you can apply this technique to either the entire product or specific parts of it.
Step 2: Choose the Object Selection Tool
On the left toolbar, select the “Object Selection Tool.” This tool is incredibly efficient for identifying and isolating specific areas within the image.
Pro Tip: Ensure the tool’s mode is set to “Rectangle” so you can make clean rectangular selections.
Step 3: Create a Rectangular Selection Around the Object
Hold and drag to create a rectangular selection around the part of the product you wish to recolor. Don’t worry if some irrelevant areas get included at first; we’ll fix that next.
Want to exclude certain portions of the selection? Hold the Alt key (or choose “Subtract from Selection” under the Options bar) and carefully drag over areas you don’t want to include.
By the end of this step, only the desired product area should be selected for color change.
Step 4: Add a Solid Color Layer
Now it’s time to bring in some color!
- Go to the Layers panel and click on the “Adjustment Layer” option.
- From the menu, choose “Solid Color.”
This will apply a block of solid color over your selected area and open the color picker panel.
Step 5: Pick and Modify the Color
Here’s where the real magic happens:
- Use the vertical slider on the color picker to select the desired hue (color family).
- Adjust the saturation (intensity of color) by moving the circle on the picker horizontally.
- Control the brightness or darkness by dragging the same circle vertically.
Once you’ve settled on the perfect color, click “OK” to apply it.
Pro Tip: You can revisit and edit the color at any time by double-clicking on the solid color layer.
Step 6: Change the Blending Mode
The new color might appear flat, seemingly covering the details and texture of the product. To fix this, change the blending mode of the solid color layer.
- Go to the Layers panel.
- Set the blending mode from “Normal” to “Color.”
This mode respects the underlying details and textures of the product while applying the new color perfectly. Voila! The product looks vibrant and natural now.
Step 7: Admire the Final Output
Congratulations! You’ve successfully transformed the color of your product photo. Take a moment to admire the fresh, new look of your product, complete with all the intricate details and textures intact.
You’ve just unlocked an incredible Photoshop skill allowing you to quickly transform product photography!
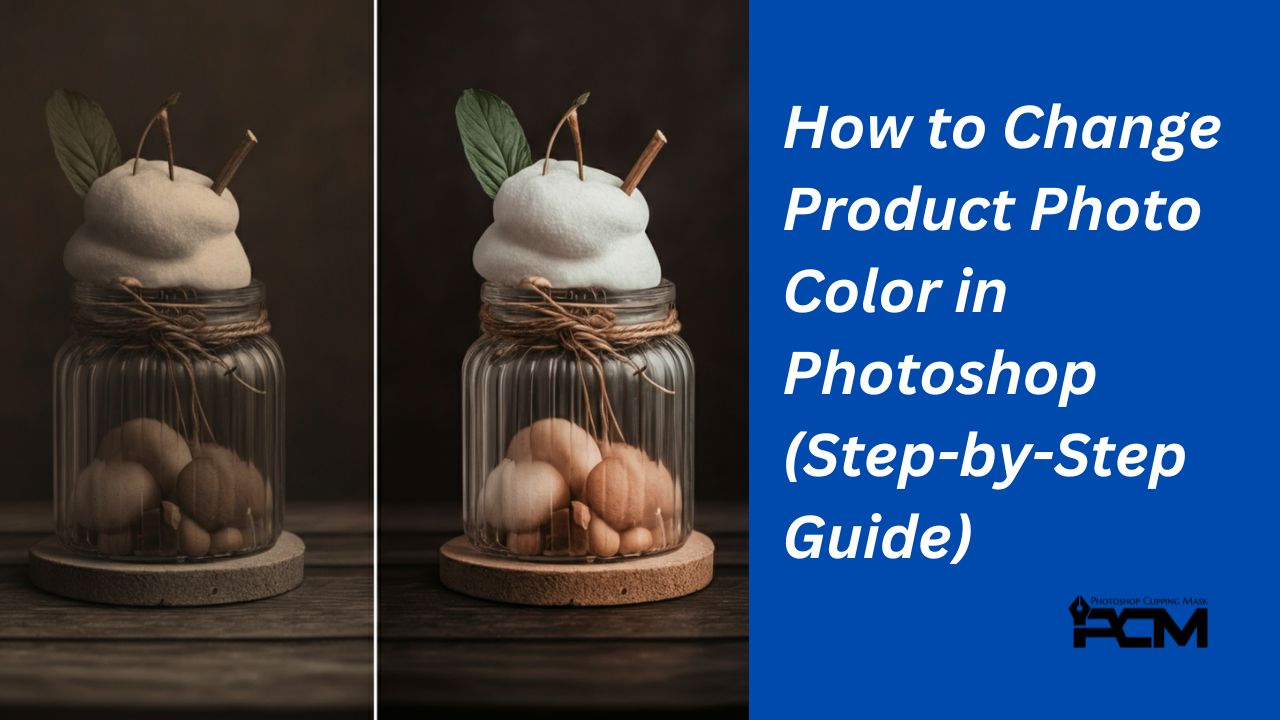
Here’s before vs. after for reference (optional to include images).
Benefits of This Method
This color-changing method is not only practical but also highly efficient.
- Non-destructive Editing: You can easily undo or adjust edits without damaging the original image.
- Customizable Anytime: Change the color as many times as you like to find the perfect hue for your product.
- Universal Use: Use this for eCommerce product photos, personal design projects, or marketing campaigns without limitations.
Additional Tips for Perfect Editing
- Use high-resolution images for the most accurate results.
- Experiment with blending modes like “Overlay” or “Soft Light” for slightly different effects.
- For better selection accuracy, consider using the “Refine Edge” option under the selection tool.
When you’re done, don’t forget to save your work in both PSD (editable) and JPG (web-friendly) formats.
It’s Time to Breathe New Life into Your Product Photos
Mastering Photoshop’s color-changing capabilities can transform your product photography, strengthen your visual branding, and spice up your photography portfolio. With a little practice, you’ll be creating professional, eye-catching product visuals in no time.
Got photos that need editing but don’t have the bandwidth to tackle them all? Explore our expert-level design services today!