
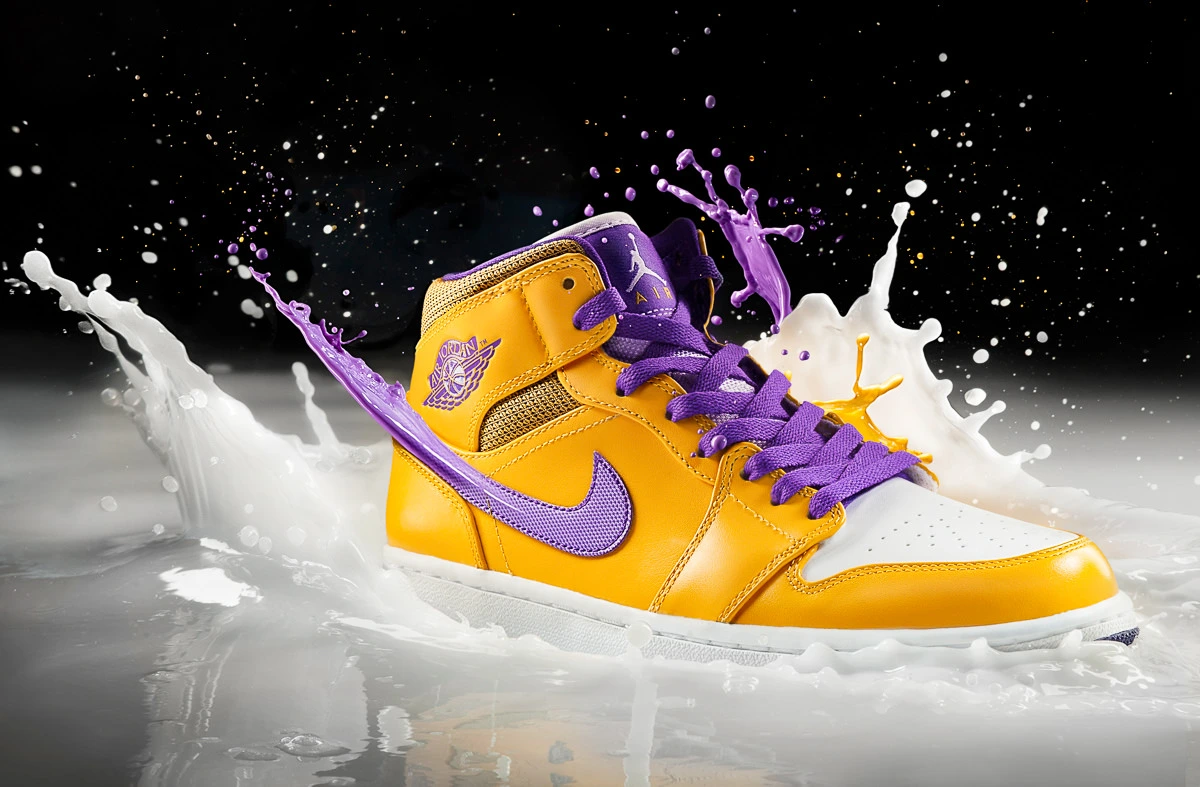
Being an E-commerce business owner is not easy! You will know the value of good product photos is the needle of your success, and to understand how to improve product photos with Clipping Path. But to find that perfect version of your image is time-consuming when its aim for created or edited, which is why it’s so vital to partner with a good clipping path service provider when you need to remove the background of product photos with Clipping Path.
Suppose you are unsure whether you need or not to help your E-commerce images. In that case, this article will discuss why having access to reliable Clipping Path Service can make all the difference in your E-commerce business accomplishment.
As an E-commerce business holder, you must design your site appearance more pleasing. When you display your product in detail, product photos with Clipping Path will attract your visitors to purchase the product primarily. That is when you need to enhance images so the page speed and comparable factors keep high. So, only signing a photojournalist will not cut the deal for you.
WHY IS THE CLIPPING PATH ESSENTIAL FOR PRODUCT PHOTOGRAPHY?
Taking product photos to represent them in online stores with eye-catching advertisements is known for Product photography. However, it is demandable and not as simple as we think. Websites like Amazon or eBay generate additional rivalry for each product.
Product photography is one of the focus areas for commercial photographers. It refers to advertising photography. This photography uses illustrating and is usually done by advertising agencies, design firms, and corporate design teams using techniques like clipping masks, clipping paths, retouching, etc.
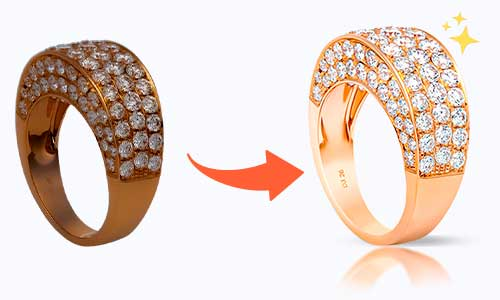
Product photos with Clipping Path are possible with many photos editing services. You can create a significant variation of product views using Clipping Paths. To make the subject clearer, you can set a different color. The errors can also be detached, such as smudges, dust, stray objects, etc. After all these enhancements, the photos look more professionally done and impressed by the customers.
Another reason for background removal is to apply more effects before releasing it to the public. Having pictures can help influence clients to buy products since it displays how the products will look in person. These possessions make the photos look more accurate.
PRODUCT BACKGROUND REMOVED WITH CLIPPING PATH
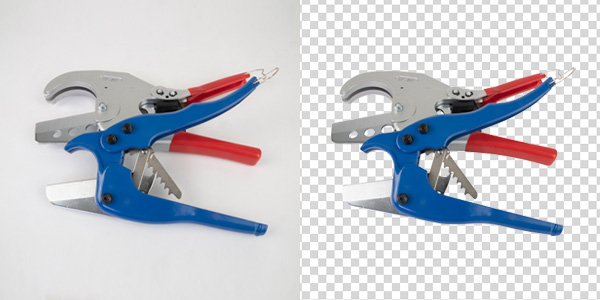
Of all the tools of Photoshop, the pen tool is beneficial to all. This tool can stretch the highest utilization for editing photos. At this particular point, A clipping path is a popular method for Background removal.
The main issue for removing the background of products is to give them a simple look and highlight if there are any details. It is essential to eliminate the context of any product and put the main subject on a white background. It is called the Clipping path technique when you separate your product background from any photos.
Product photos with Clipping Path also desire color correction, photo retouching, and optimization, giving to the website requirement.
7 WAYS TO USE THE PRODUCT CLIPPING PATH TO ENLARGE YOUR SELLS

Keep your product on white background from funky fonts to attention-grabbing color combinations; you can play with design if it comes to your online business, whether it won’t work the same with third-party marketplaces like Amazon, Walmart, eBay, etc. These brands limit creativity with some restrictions on editing factors of the products showcased. Photos with Clipping Paths are one of the restrictions we mentioned earlier.
The object’s edges can get fairly even and conventional with an occasional negligible bump. So, the clipping path technique is a great fit! For example, your product needs to get a white background with the support of the clipping path method.
2. Ready photos for your e-commerce business
You can use more creativity unless marketplace selling. This allows you to customize your product image to be consistent with the aesthetic brand, including text overlays and colored backgrounds.
Any sustainable websites use a light grey background to look for a beautiful, clean product for showcasing on the webpage. Follow Amazon’s guidelines to apply off-white backends to not steal the focus from your target subject of the image. Following this tip, you can give a consistent professional look to your product across your channels.
Reuse any of your products with a clipping path by applying solid backgrounds in photoshop and creating a new feel in this way.
3. Separate products for additional photo editing manipulations
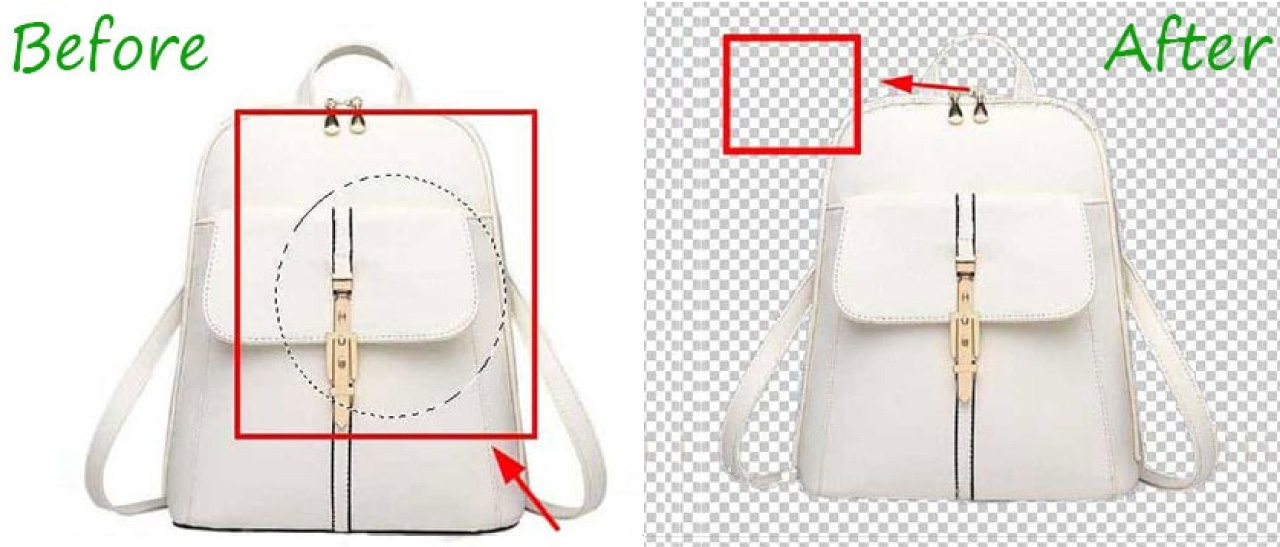
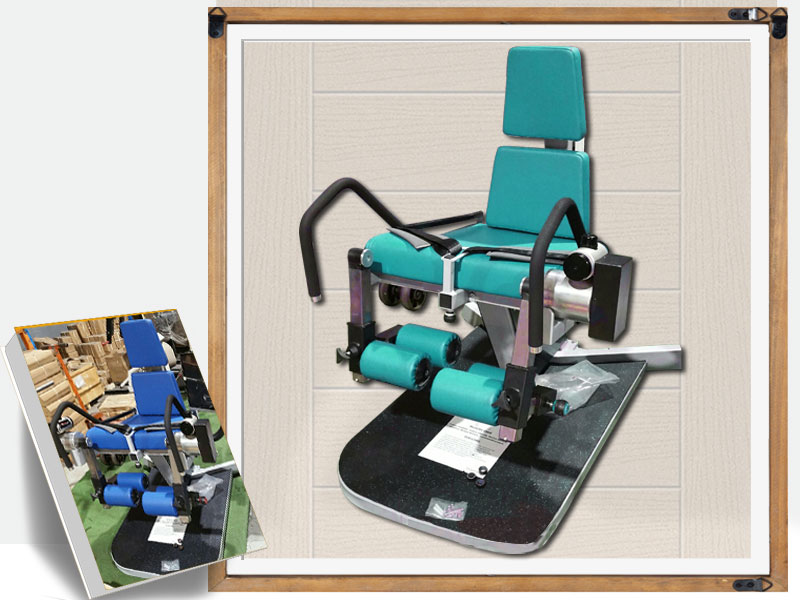
Product editing is a process where multitasking actions may involve to make it unique. The clipping path is the initial stage of doing these actions for succeeding photo edits. Suppose you notice the before/after photo below. In that case, a product undergoes a sequence of post-production edits, including background removal to highlight the product layout after completing the manipulations.
The color change is another retouching stage, which plays with the image after clipping path manipulations have eliminated the object. Products being more excellent for marketing via social media involved Photos with Clipping Paths.
4. Remove error elements from the subject.
Product photography may act like imagination. Where you may want your product can float on air, fix it at any angle or ratio, using a standard model to display it. At the same time, there are more tricks you can choose to frame on the shoot day. To rely on the Clipping Path service, your props or elements can move anyway, no matter what on the final shot. Removing error from the props or pieces become handier with the Product Clipping Path.
Experienced photographers don’t want to click products with unwanted errors, which is quite impossible nowadays. We often need to eliminate hangers, price tags, and copyright labels from the product image, a prominent example of Clipping Paths’ demand.
5. Turn images into animated GIFs.

Videos or GIFs perform great on social media channels rather than stills. Video posts accept more engagement than any other content type on social channels. But the challenge is doing all this; you have to have the skills of Clipping Path no matter what.
6. Gather product collection photos
You can’t always plan to do image savings. Things can slip off your mind quickly. Clipping path service or cutting out objects and placing them together for a stunning effect can create a benchmark! Great group images or series shots of clipping path product images can help you to get potential customers. Creating product bundles by clipping out specific products and then inserting them together in a single image also works well. And it’s time savvier than reshooting all the items together.
7. Creating a library of cut-out products
To repurpose product photos for marketing, creating a library of cut-out images using Product photos with Clipping Path is a great idea. This will become helpful to extend your business for photography investment.
Combine your cut-out product images or items into an info graphic, or create a collage for Facebook advertisements.
HOW PHOTOSHOP CLIPPING PATH IMPROVES PRODUCT IMAGES
Among all the professional photographers, a bunch of professional skills that know how to Photoshop clipping path works is rare. Photo editors’ custom a Photoshop clipping path to apply the effect. Yes, there are numerous tricks for the same result. But removing a background from any image is the most effective way, no doubt.
- It is exact and gets the job done so fast.
- It protects time and, consequently, money.
- Professionals appreciate that it is a time-consuming task to custom intuitive background removal tools.
- It is better to rely on clipping path service to guarantee the best quality of work.
- It becomes the support of eCommerce.
Customers are demanding, and only Product photos with Clipping Path can attract customers for online stores or businesses. Therefore, this method is extensively used for E-commerce product marketing to deliver sharpness and cropping with the Clipping path. If your company has to deal with thousands of products, you must ensure your product photo is perfectly done and in good condition. Any other attempts can be a disaster if avoiding this criterion.
BOTTOM LINE

The e-commerce business is rising very fast. People are swapping to online products rather than physical shopping because of convenience. Many industries are enhancing their online products to be eye-catchy to their clients, ensuring their products get sold. Using Clipping Path service to remove the background from an image for eCommerce products to make elements look more attractive, professional, and natural. Product photos with Clipping Path and masking techniques are equally crucial for product marketing. Because any minor flaw can cause an image to look unnatural or unrealistic, it’s significant to zoom in as much as possible to get closer edges to cut straight lines while maintaining the excellence of a product intact.