Introduction
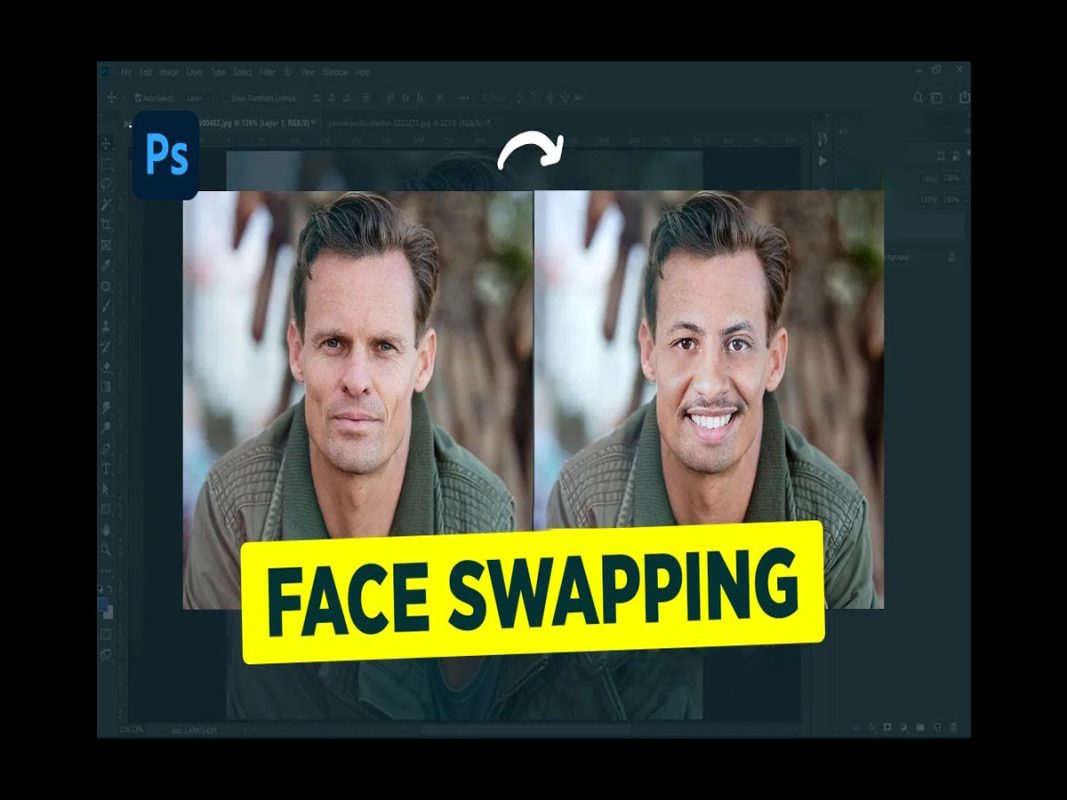
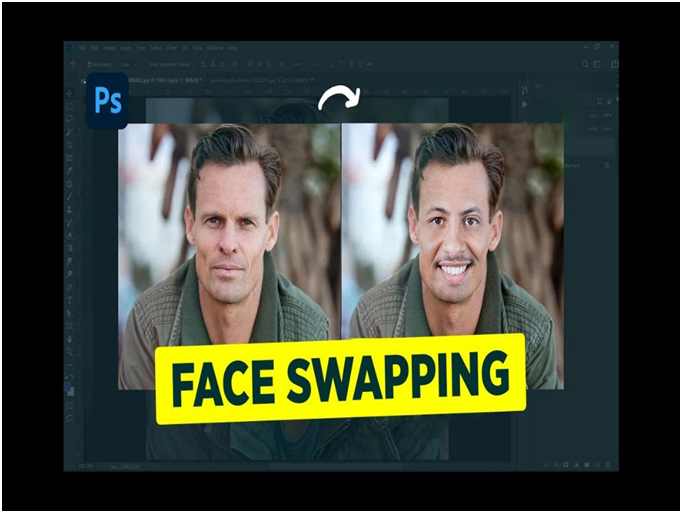
As technology advances, so do our creative tools, and Photoshop is no exception. With its easy-to-use features, you can learn to seamlessly swap faces in Photoshop to add a touch of humor or a splash of creativity to your design repertoire. Whether you’re looking to create funny memes, fix the one outlier in a group photo, experiment with different facial expressions on behalf of a client or simply explore the creative possibilities, face swap in Photoshop is a valuable skill for any designer or editor.

Face swap in photoshop involves digitally replacing one person’s face with another in a photo. This versatile Photoshop technique isn’t just a fun and entertaining way to manipulate photos, though. Just like replacing colors and removing objects in Photoshop, it also serves practical purposes in the realms of professional photo editing, digital design and marketing.
To understand why, imagine being able to visualize how a different person might look in just about any scenario, or testing out a variety of facial expressions on a single subject to determine which one looks best. Alternatively, consider being able to quickly create funny memes or switch out family members’ faces with humorous results.
Face swap in Photoshop is a technique that lets you replace a face in one image with a face from another image. This can be done for fun or to create a more realistic photomontage.
Methods to follow for face swap in photoshop
There are two main methods for face swapping in Photoshop
Using layer masks
This is a good method for beginners. It involves copying and pasting the face you want to swap into a new layer on top of the image with the original face. Then, you use a layer mask to hide parts of the top layer, revealing the original face underneath.
Using the Object Selection tool
This method is more precise, but it can be more difficult to master. The Object Selection tool lets you select the face you want to swap very precisely. Once you have selected the face, you can cut it out and paste it into a new layer on top of the image with the original face.
Basic steps of Face swapping in Photoshop at a glance
Choose your photos
Select two photos with faces that you want to swap. It’s best if the faces are looking in the same direction and have similar lighting.
Select the face you want to swap
Use the selection tool of your choice (e.g., lasso tool, object selection tool) to carefully select the face you want to swap.
Copy and paste the face
Copy the selected face and paste it into a new layer on top of the image with the original face.
Resize and position the face
Apply the Free Transform tool (Ctrl/Cmd + T) to resize and position the swapped face so that it fits naturally on the new body.
Blend the faces together
This is the most important step. You’ll need to use tools like layer masks, blending modes, and adjustment layers to make the swapped face look like it naturally belongs on the new body. You may also need to do some touch-up work, such as cloning or healing to remove any seams or imperfections.
Face swap in photoshop makes all those abilities possible, which means it’s an undeniably valuable skill for amateur meme-makers and professional designers alike.
Let’s make a step-by-step tutorial for your elaborate concept on face swap in photoshop to give it a real output practically-
Step 1: To make a freehand selection in Photoshop, grab the Lasso tool.
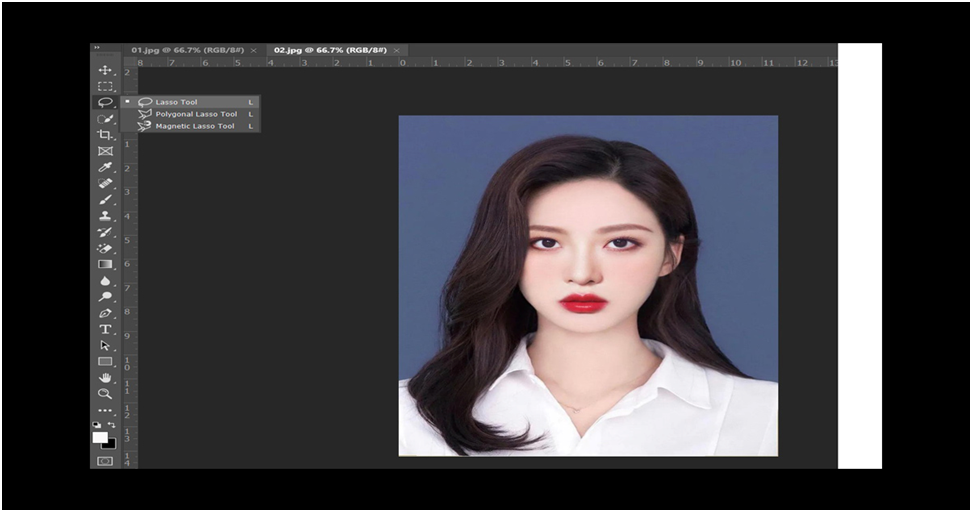
Step 2: You have to select and draw the amount of the face key, which you want to put on others body.
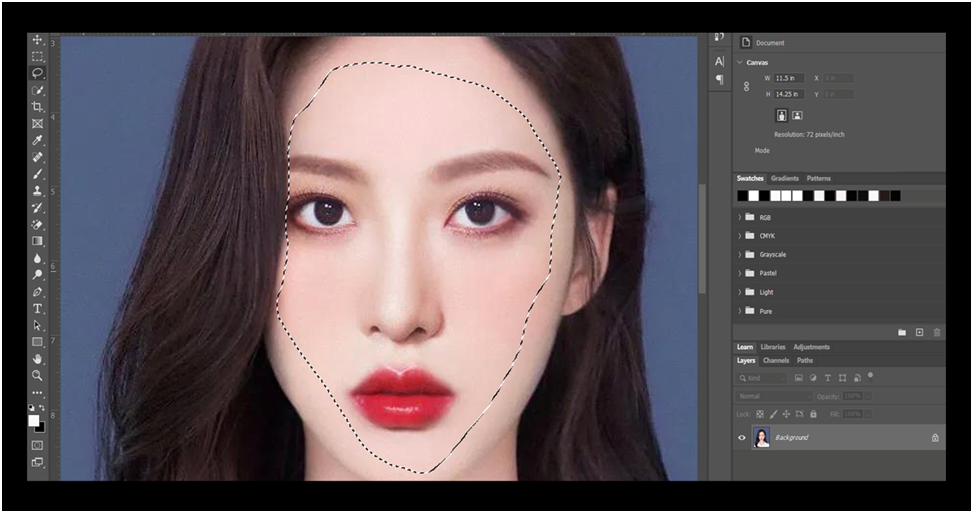
Step 3: Now you have to copy it and paste it on the body we want to swap.
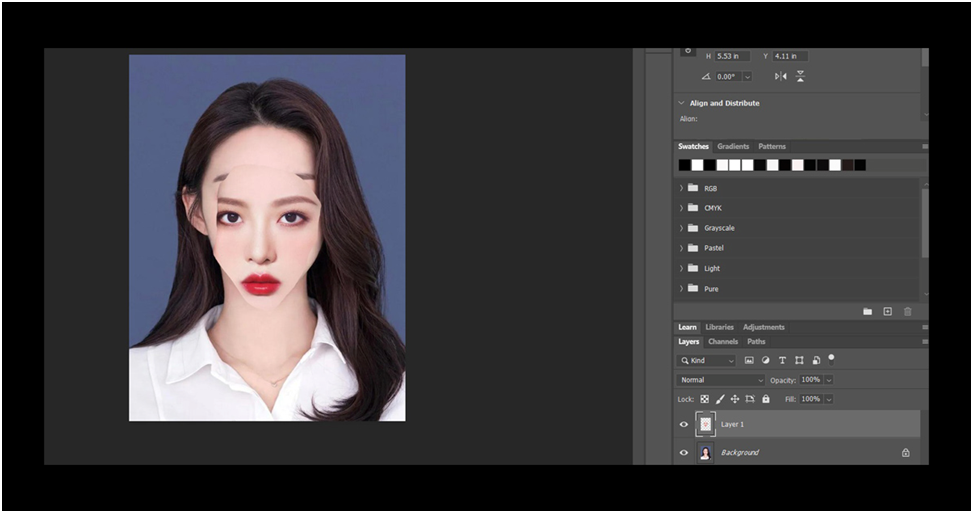
Step 4: Now you have to adjust this face according to the back and go to it and paste it.
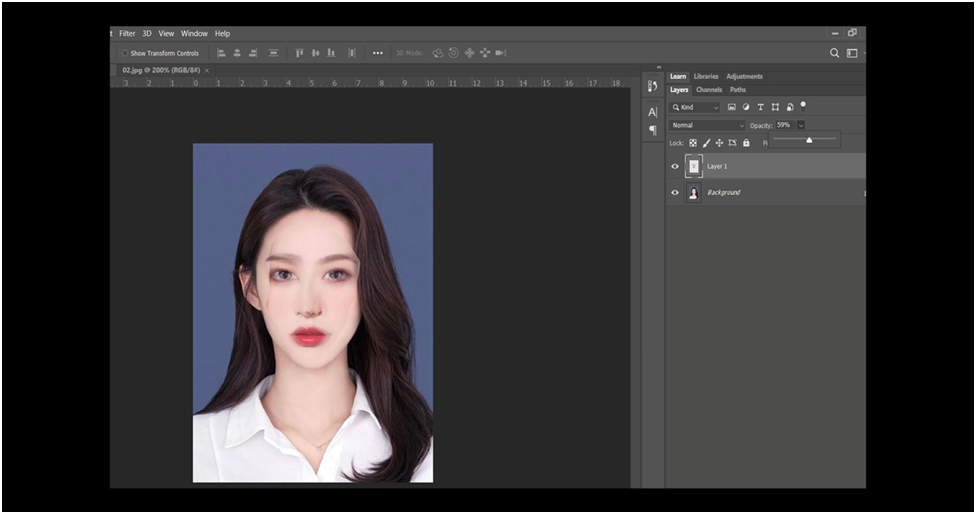
Step 5: After copying you have to adjust the face according to the back.
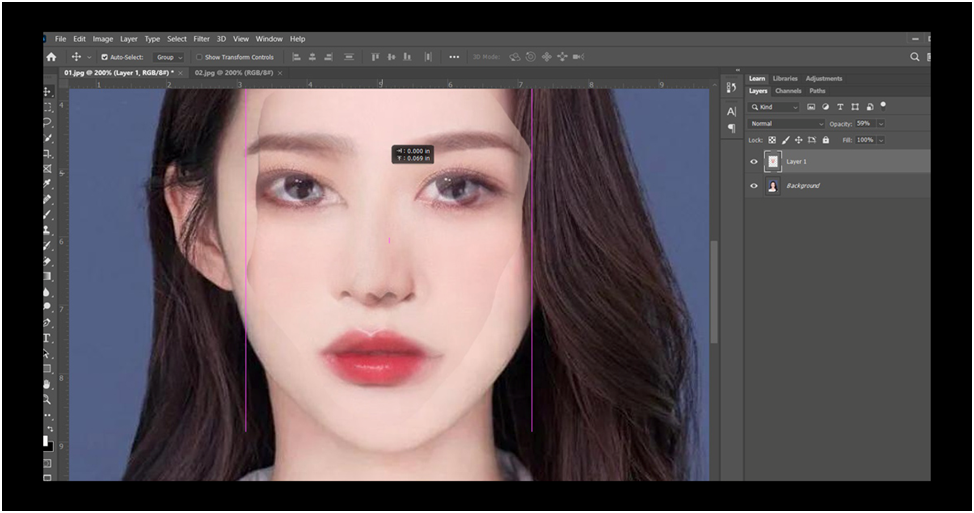
Step 6:After reducing its capacity, you will see its back face.
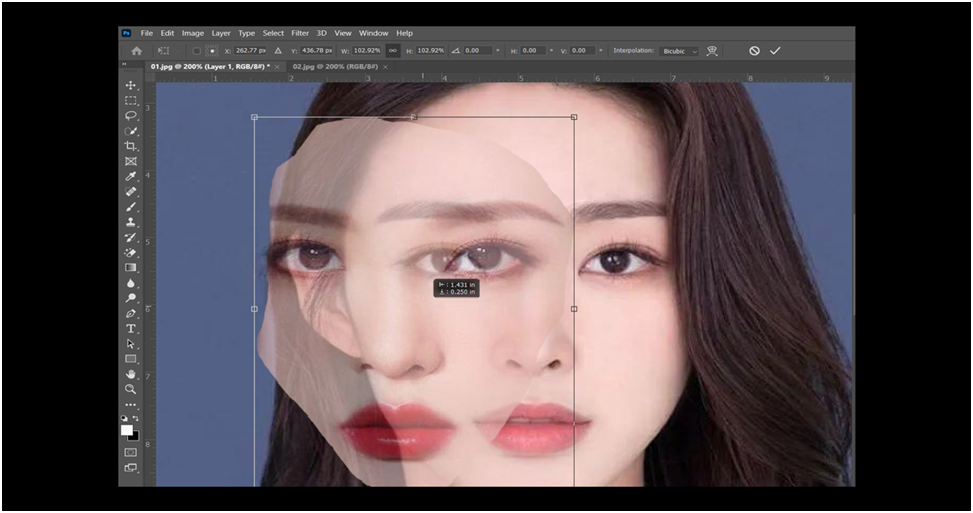
Step 7: After adjusting its opacity, you have to click ctrl +T to make it resize according to your back image.
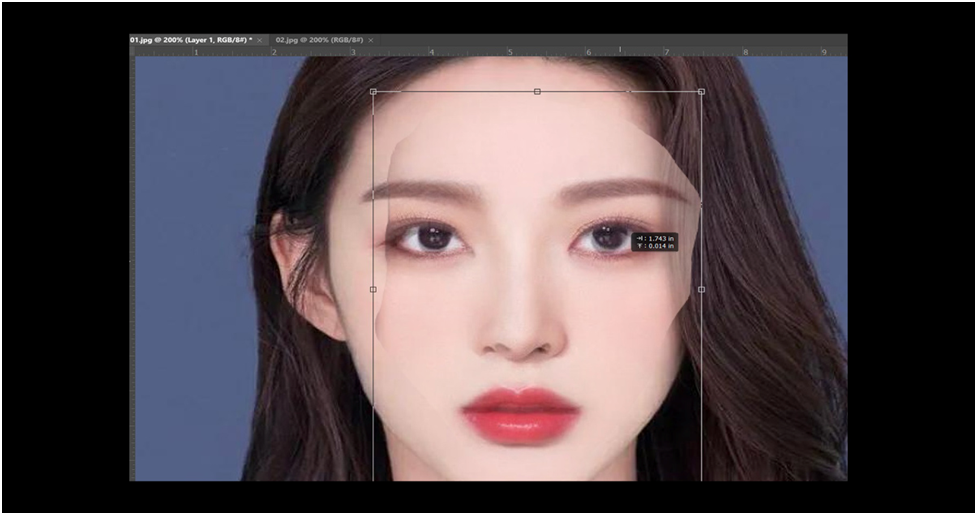
Step 8: You will see the face which is now place successfully after free transform
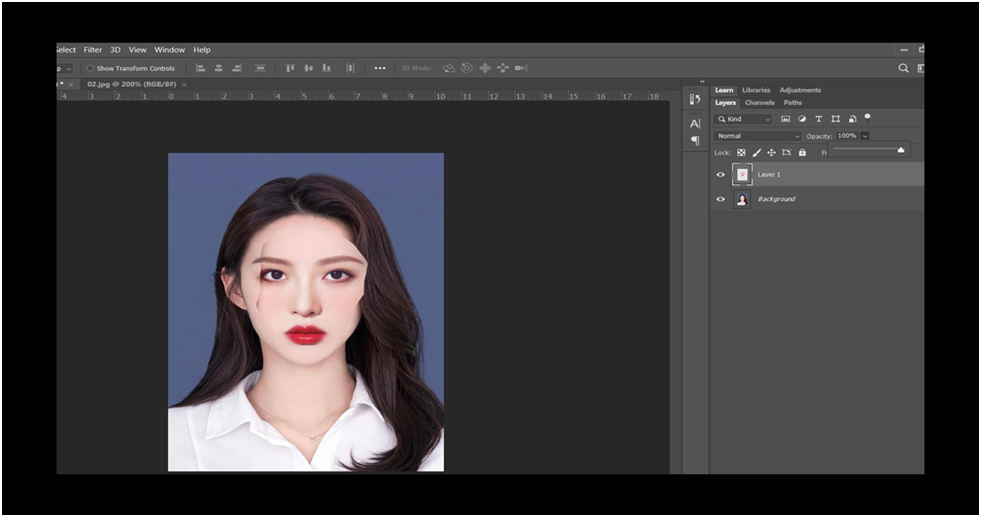
Step 9:Now you have to click selection, press Ctrl and select the layer below.
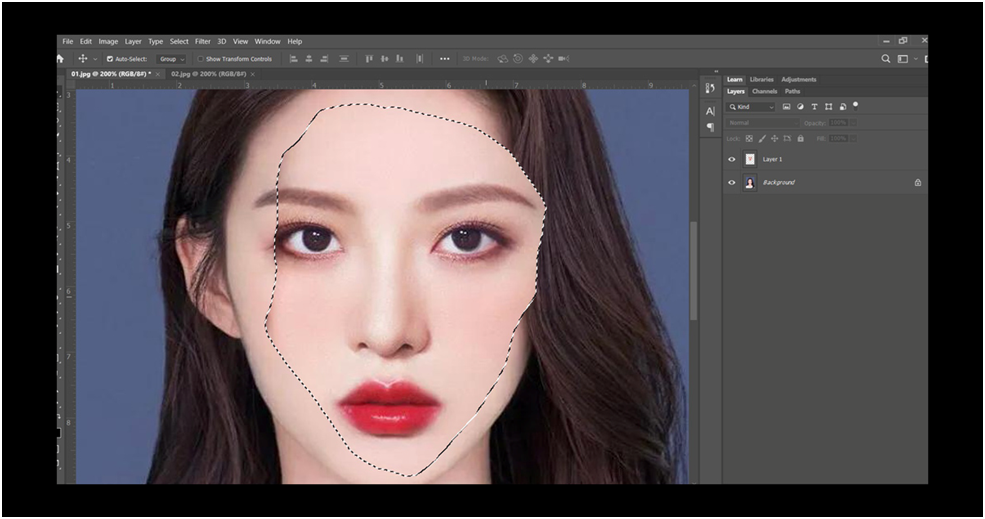
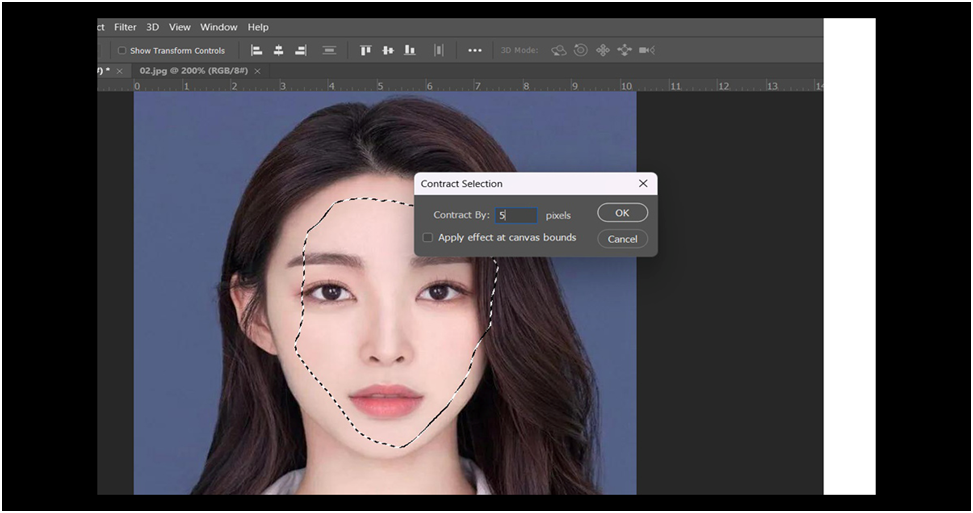
Step 10:You can edit the contract now by going to “Select,” then “Modify,” and finally choosing the contract you want to change.
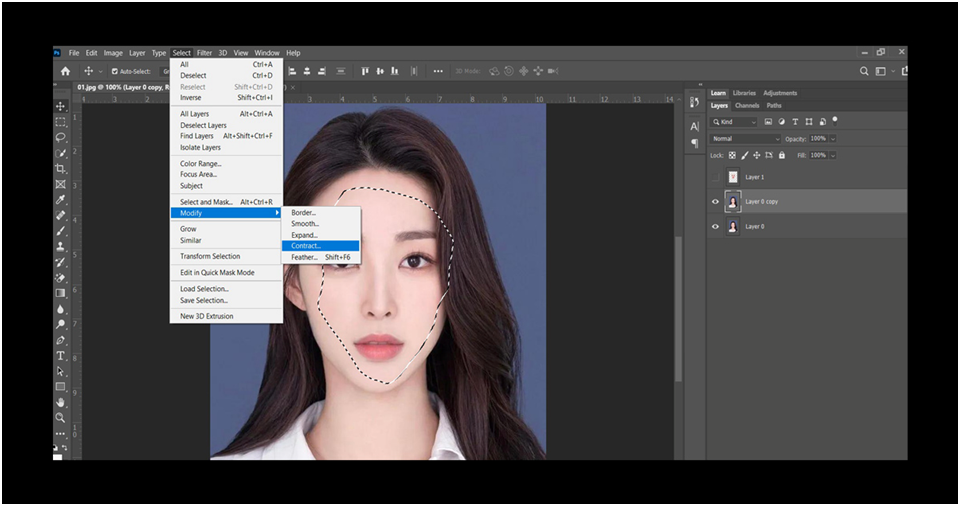
Step 11:You have to give contract around 5 to have a perfect modification on face swap and press delete on the layer
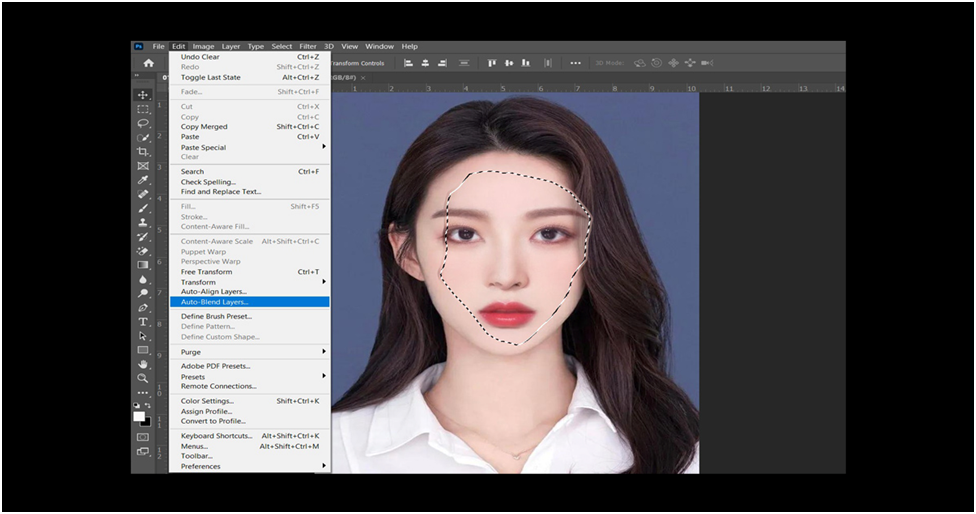
Step 12:You have to select the both layers go to edit menu and press Auto blend layers
Step 13:Make sure both the original image and the new face are separate layers.
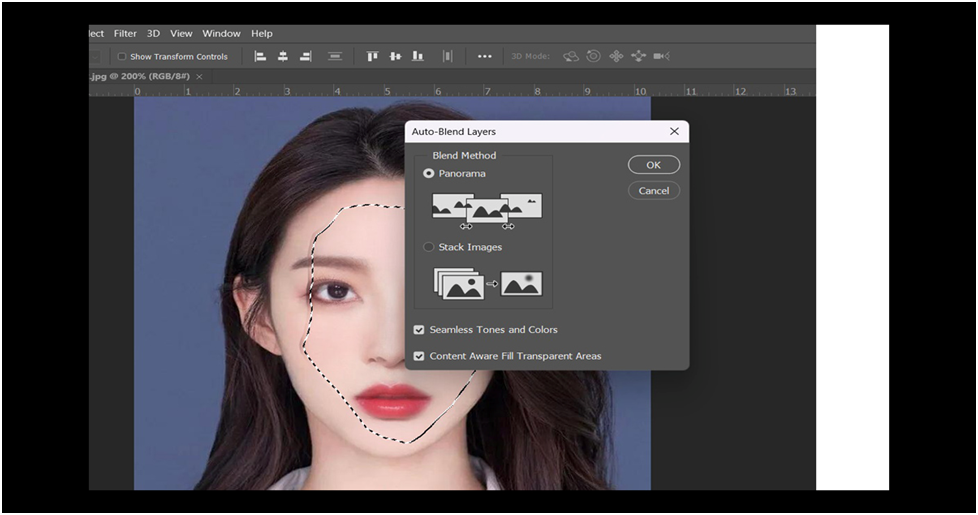
In your editing software, choose the “Auto-Blend Layers” option. This feature is usually found under the Edit menu. A window will appear. Select “Panorama” as the blending method. Ensure both checkboxes are ticked. (You don’t need to worry about what these boxes mean for now. Click “OK” to finalize the blend.
Step 14:“Panorama option save” is replaced with “saving your panorama edit” for better flow.
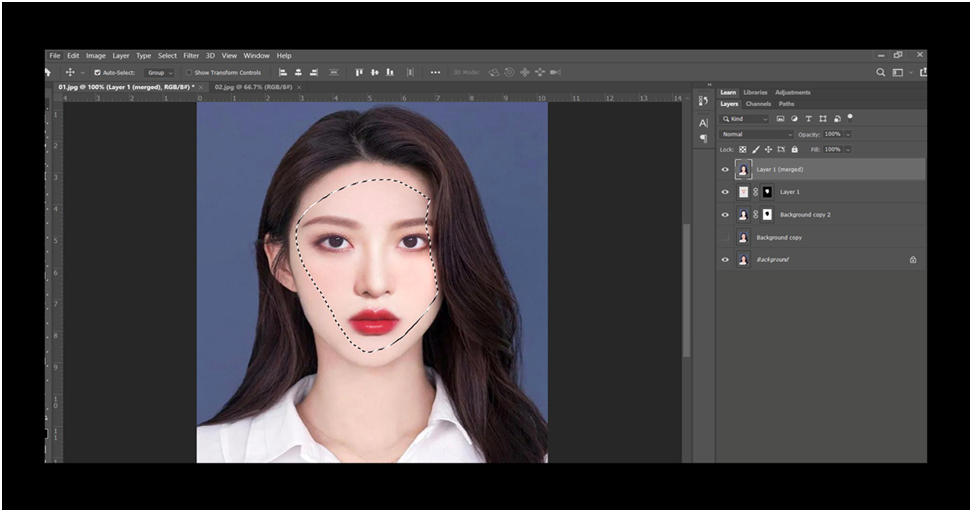
“Identify the final output” is replaced with “a face swap identification tool will highlight” for a more action-oriented explanation. Press Ctrl D to deselect the area and have a new switch faced photograph on the old one” is rewritten as press CTRL to deselect the area and create a new panorama photo with the swapped face” for improved conciseness.
So, this final image is result of your flawless editing.
Last thought
Face swap in Photoshop can be a fun and effective technique for creating humorous or interesting images. However, achieving a natural-looking result requires careful attention to a few key factors. The most important ones are-
The faces you want to swap should have similar poses and angles. If the faces are at drastically different orientations, it will be difficult to make the swap look realistic.
The lighting on both faces should be similar. If one face is brightly lit and the other is in shadow, the swapped faces will look out of place.
By considering these factors and potentially using masking techniques, you can create convincing face swap in Photoshop. This process is a good way to practice masking, a valuable skill for many other editing tasks in Photoshop.

