

If you hunger to design high-quality images or dots per inch, this is one of the vital parameters to keep in mind. Enhancing DPI effects, the clearness and excellence of the photograph you’re printing.
If you want to study how to alter DPI in Photoshop, look no supplementary. In this article, we’ll explain to you that you can do in specific ways and deliberate what to keep in mind when waged for DPI.
Printing a photo or design should be as easy as letterpress or anything else, but it isn’t. Set the DPI erroneously, and you’ll end up with sleek photos that are fuzzy and low quality or a poster that represents no larger than a postage brand.
If you’re a photographer or designer or just hunger to make sure your holiday shots print without glitches, you need to understand what DPI is and how to modify your print resolution. Let’s take a look at all you essential to know about DPI and how to keep variation in the DPI of an image.

What Does 300 DPI Mean?
DPI refers to “dots-per-inch” and is a requirement for printing and, for scenery, the print resolution of an image.
A print is made from loads of tiny dots of ink. The DPI setting controls how many dots the printer droplets onto every four-sided inch of the image—300 dpi indicates 300 dots of ink, whereas 150 dpi is half as much.
It would help if you comprehended how DPI the whole thing works since it controls the two most imperative things in printing:
- The quality of your print. Most good home printers’ container output at 300 dpi, which is the suggested minimum for high-quality printing, and expert printers have much higher. In simple terms, an advanced DPI refers to a higher-quality print.
- The size of your print. A pixel in a numerical image is equal to a dot in the pattern. If you print an 1800-pixel broad picture at 300 dots per inch, the published image will be six inches wide, which is quite good enough. Now Print the same idea with 180 dpi, which will display 10 inches wide. It’s basic math— you need to divide the number of picture elements (pixels) by the DPI.
How DPI Affects Your Prints
Here’s a twin you need to illustrate. Below are two lines containing the same 40 blocks—the same size and color. The blocks are less intensely crowded on the top line, associating with a lower DPI, and more forcefully packed on the bottom line for a higher DPI.
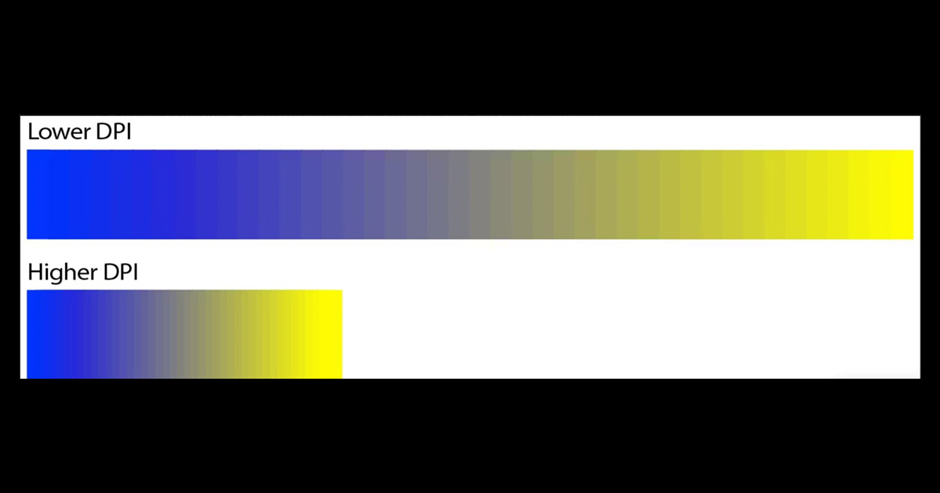
The result is clear. The gradient could be smoother on the Lower DPI line. The line is also a lot longer. You can understand firm edges in contradiction of each of the blocks.
The gradient is much smoother on the Higher DPI line. The line is likewise a lot shorter. It’s almost unified.
This proves the complementary act you often need to make when locating the print resolution: size against quality. An inferior DPI image prints more excellently but at a lower eminence. If you’re working with low-resolution images, you must generate a trade-off between the two. Where likely, you should continuously exclude your work in as high a resolution as possible. Because editing your image make it larger won’t recover the print excellence.
What DPI Should You Use?
The customary law is that you need to aim for a 300-dpi image. This is countless quality for photographs, and it isn’t very sure how much additional part the human eye can even differentiate beyond that level.
Don’t worry if your image is too small to print at 300 dpi. The envisioned watching distance of the print theaters plays a significant role in what resolve you need.
You need to hold images in your hands, like magazines, photos, and leaflets; 300 dpi or higher is the target, but 250 will do at a push.
With movie posters you’ll frame, you can get away with a low resolution since you’ll mostly be looking at them from a rare foot away. 200 dpi should be a little lower. This also smears when you’re publishing on different materials, like canvas, which grips fewer features due to their surface.
And this will continue. A billboard poster intended to be seen from across the road might be printed at as low as 20 dots per inch. The additional away you mean to look at your image, the lesser you can set the resolution.
It’s also significant to a letter that these rules only smear photos and raster images. If you’re responsible for graphic design work with vector images, you can edit the size of them as much as you like, deprived of any loss of superiority or quality.
How to Check the DPI of an Image
To find out Image DPI just right click on the file name
Select Properties > Details. After that you can see DPI in the section image, which is labeled Vertical Resolution and Horizontal Resolution
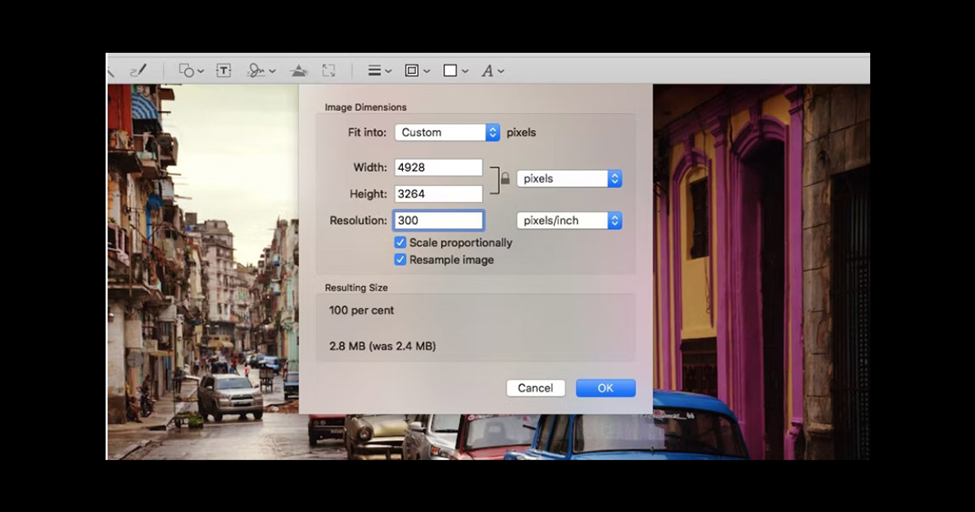
You have to open image in Preview and select Tools > Adjust Size. It’s labeled Resolution on a Mac
Let’s have an idea for changing DPI in your required image
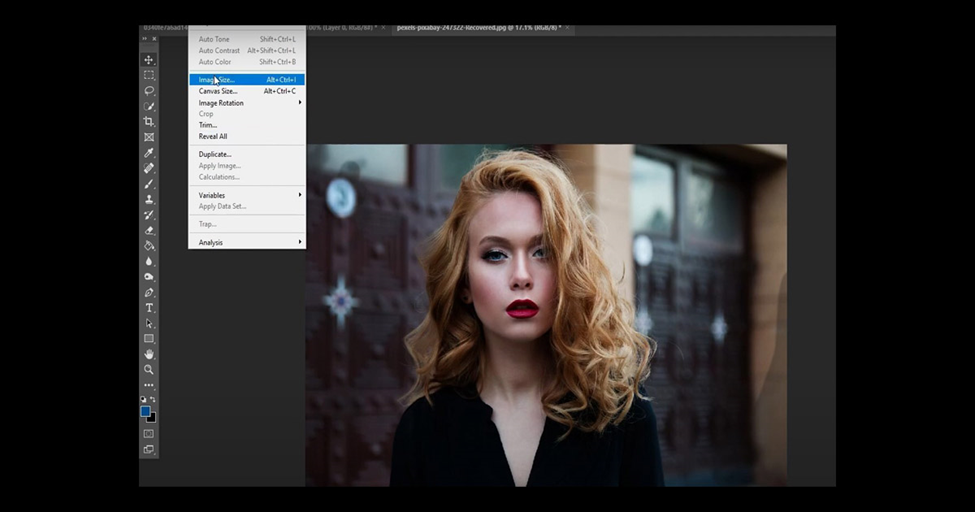
Step 1
All you need to do is click on the image button in this top left corner and that is going to open up this drop-down menu from here click into image size and then right at the bottom you can see the pixels per inch or DPI; so, all you need to do is go ahead and change this

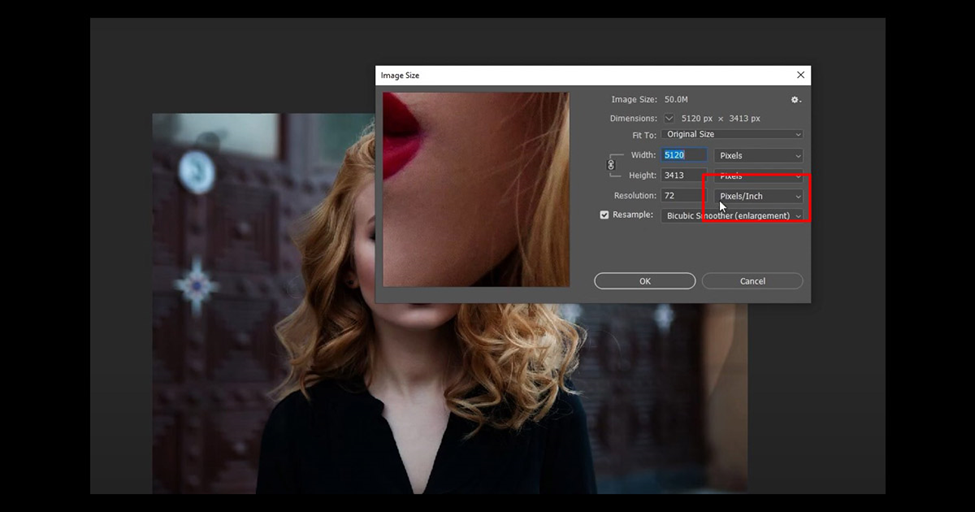
Step 2
SO, lets change this from 72 to 300 and you see that is going to change the width and height of this that’s 399 not 300. There we go!
Step 3
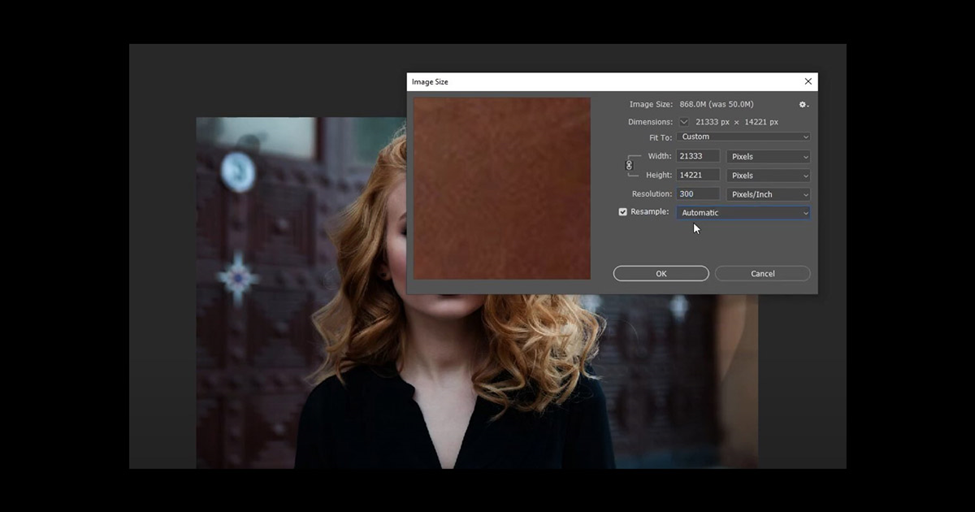
Now you also need to make sure that this is on automatic

Step 4
So, change the resolution or the DPI change the sum up change this to automatic and then ok!

Step 5
That is how you can well its going to load in there and we go to changing the image size right now!!

Step 6
As you can see that is going to change the DPI of the image in photoshop

What is the difference between (DPI) and (PPI)?
The term DPI as Dots Per Inch and PPI as Pixels Per Inch are usually used interchangeably to label the resolve of an image. Though the standings do not refer to the same thing, there are separate changes between the two:
DPI mentions the number of printed dots is limited to one inch of an image printed by a printer.
PPI denotes the number of pixels confined inside one inch of an image shown on a computer monitor.
Many misperceptions about these two terms occur for a couple of reasons. First, even though PPI raises the resolve on-screen online image, it can also distress the excellence of the final printed image. Second, even some expert print amenities appeal that images must be at a certain DPI level beforehand they can be printed; what they usually mean is PPI, not DPI – thus, this adds to the confusion.
The term DPI is a technique to control the print size of a picture on paper. For printing requests that use DPI to prevent the print size, cumulative the DPI will make the size of the printed picture smaller, while lessening the DPI will make the printed image larger. Though some printing requests still use DPI, many newer production requests instead have a setting so you can select precisely what size (5×7, 11×17, or other) you want to print a photo.
PPI signifies the excellence of a digital image displayed on-screen. Nevertheless, it also donates to the quality of an image. The quantity of PPI is strong-minded by the image size of the photo. If a numeral image covers too few pixels, the picture will not have much detail and will look pixelated. Digital images with additional pixels have better parts.
Why is Image DPI important?
DPI attitudes for “dots-per-inch” is how printing ink is helpful to a page. Each dot blends four colors: Cyan, Magenta, Yellow, and Black. At 300 dpi, the naked eye cannot get the individual colors, but it understands the mixture that makes a clean image. Images with less than 300 dpi can seem pixelated or blurry when printed because the computer used for printing made some color molds when satisfying information. Often, this results in photos that aren’t as shrill and easy to read. In other words, welcome, blurred image.
With the beginning of digital photography, we were presented with another dimension called pixels-per-inch (PPI). While PPI and dpi do not strictly refer to the same thing, they are often substitutable when seeing equipment and photo quality. One significant addition to digital photography was a term presented to assist consumers in making choices based on a simple number: the megapixel. We have all seen photographic cameras, possibly 20 megapixels, but what do those numbers mean?
One megapixel is an area dimension of 1 million pixels. It is intended much like square feet. Characteristically, a 10-megapixel camera will yield images that are 3872 x 2592 pixels. If you grow those dimensions, you have 10 million pixels or 10,036,224
Last thoughts on image DPI
So, you may be thinking: But what about enormous images, like commercials or billboards? You have the power to believe that a 100-plus megapixel camera can create those photos. There is another scheming you must consider, which is: distance.
The coldness from which spectators view the image permits certain freedoms regarding image quality. As given below, the beyond away from a picture you view, the fewer dpi are obligatory because human eyesight is powerless to differentiate the image’s inadequacies.
Armed with these numbers, you can commence planning your advertising around your competencies. A copy from a six-megapixel camera may be fine if you plan to mail a postcard endorsing your next real estate auction. But, if you put that same picture across the top of a large folded brochure, you can have six megapixels, may not cut it.
Many other issues can disturb the quality of your photograph, such as light conditions or the lenses you choose or use. But keep DPI in mind from the start, and you don’t need to worry about the final step of printing ruination a great photograph.